Code
The branch for this chapter can be found here
To manage the dependencies and build process of your app you can either use yarn or npm. There used to be a significant difference in performance and security using yarn but npm has closed the gaps pretty much. Catch-up here.
Create yourself a folder to work in and follow the steps.
- Yarn
- npm
yarn create react-app starter-app --template typescript
npm init react-app starter-app --template typescript
This will create a new React app in the folder starter-app. Easy as that.
Change into the starter-app folder that was just created to start the development server.
cd starter-app
yarn start
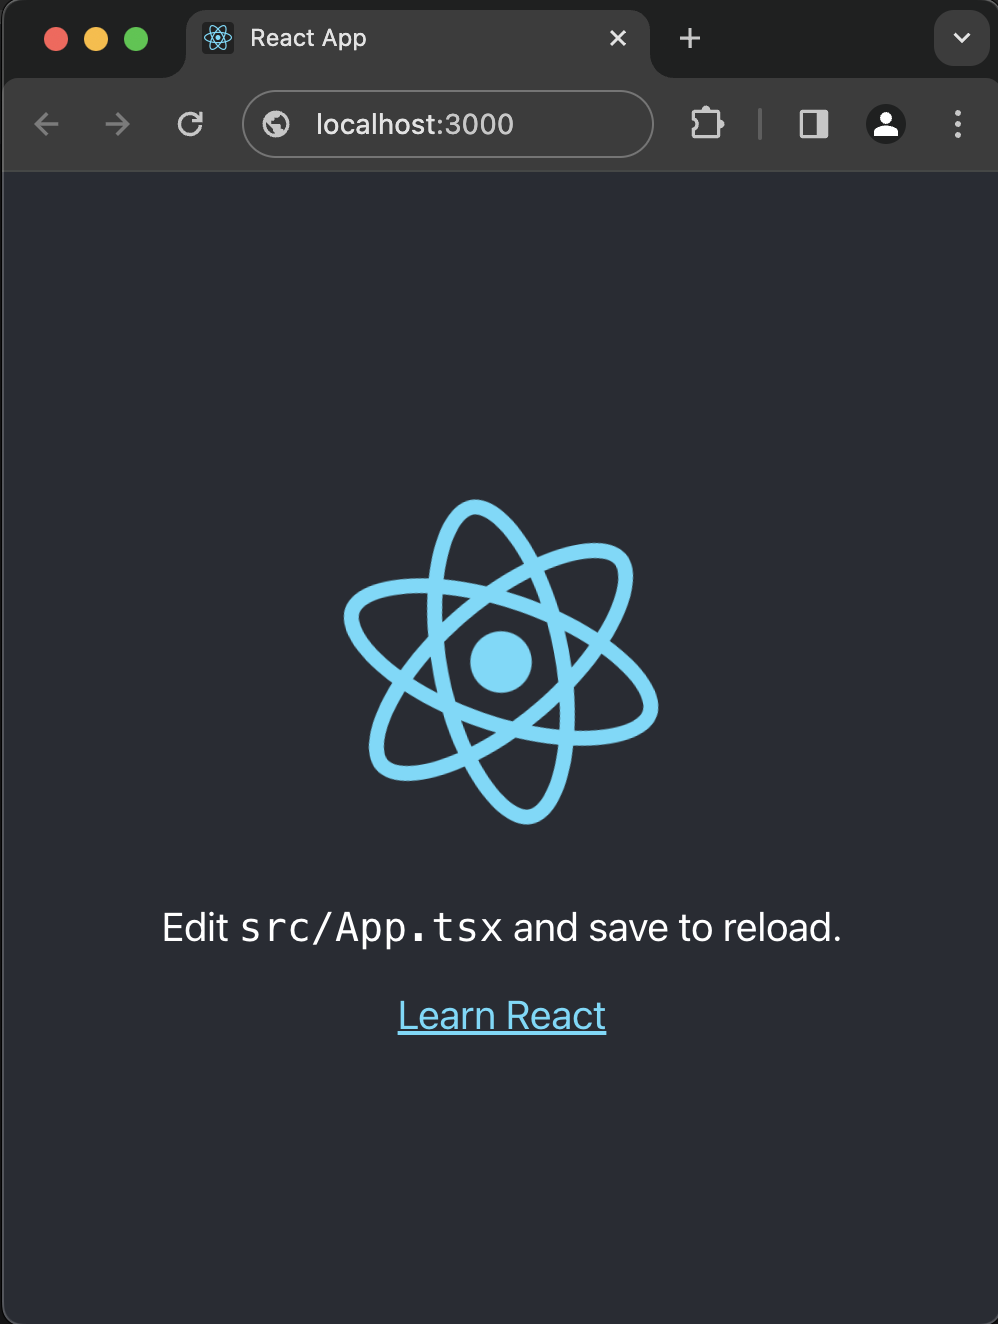
Visit http://localhost:3000 in your browser and behold your React App! 🚀
That was short and sweet.
Typescript
Notice the --template typescript in the command. By using this option we
requested the React app to be written in Typescript.
While you can create your app in 'plain' Javascript it is a significant help to use Typescript as it provides some extra's that Javascript does not provide.
As a superset of Javascript, Typescript offers static typing, classes and interfaces which help to strong(er) type your data structures and methods. The compiler and your IDE will be able to warn you about inconsistencies in your code ahead of time like passing a numeric parameter to a method when it expects a string.
Typing not only helps avoiding incorrect code usage, it asks you to think better about your data structures and the code that uses it. You have to be more explicit how you design your code resulting in cleaner code. This in turn improves readability, testability and maintainability. It makes tasks like refactoring a lot less difficult to do.
Lastly, be aware that the only place where Typescript lives is as annotations and definitions in your code and is compiled into plain Javascript at build time. In other words your App will not 'run' any typescript as it is all stripped and compiled into plain old Javascript. There are no performance differences between a running App written in Javascript or Typescript.
Folder structure
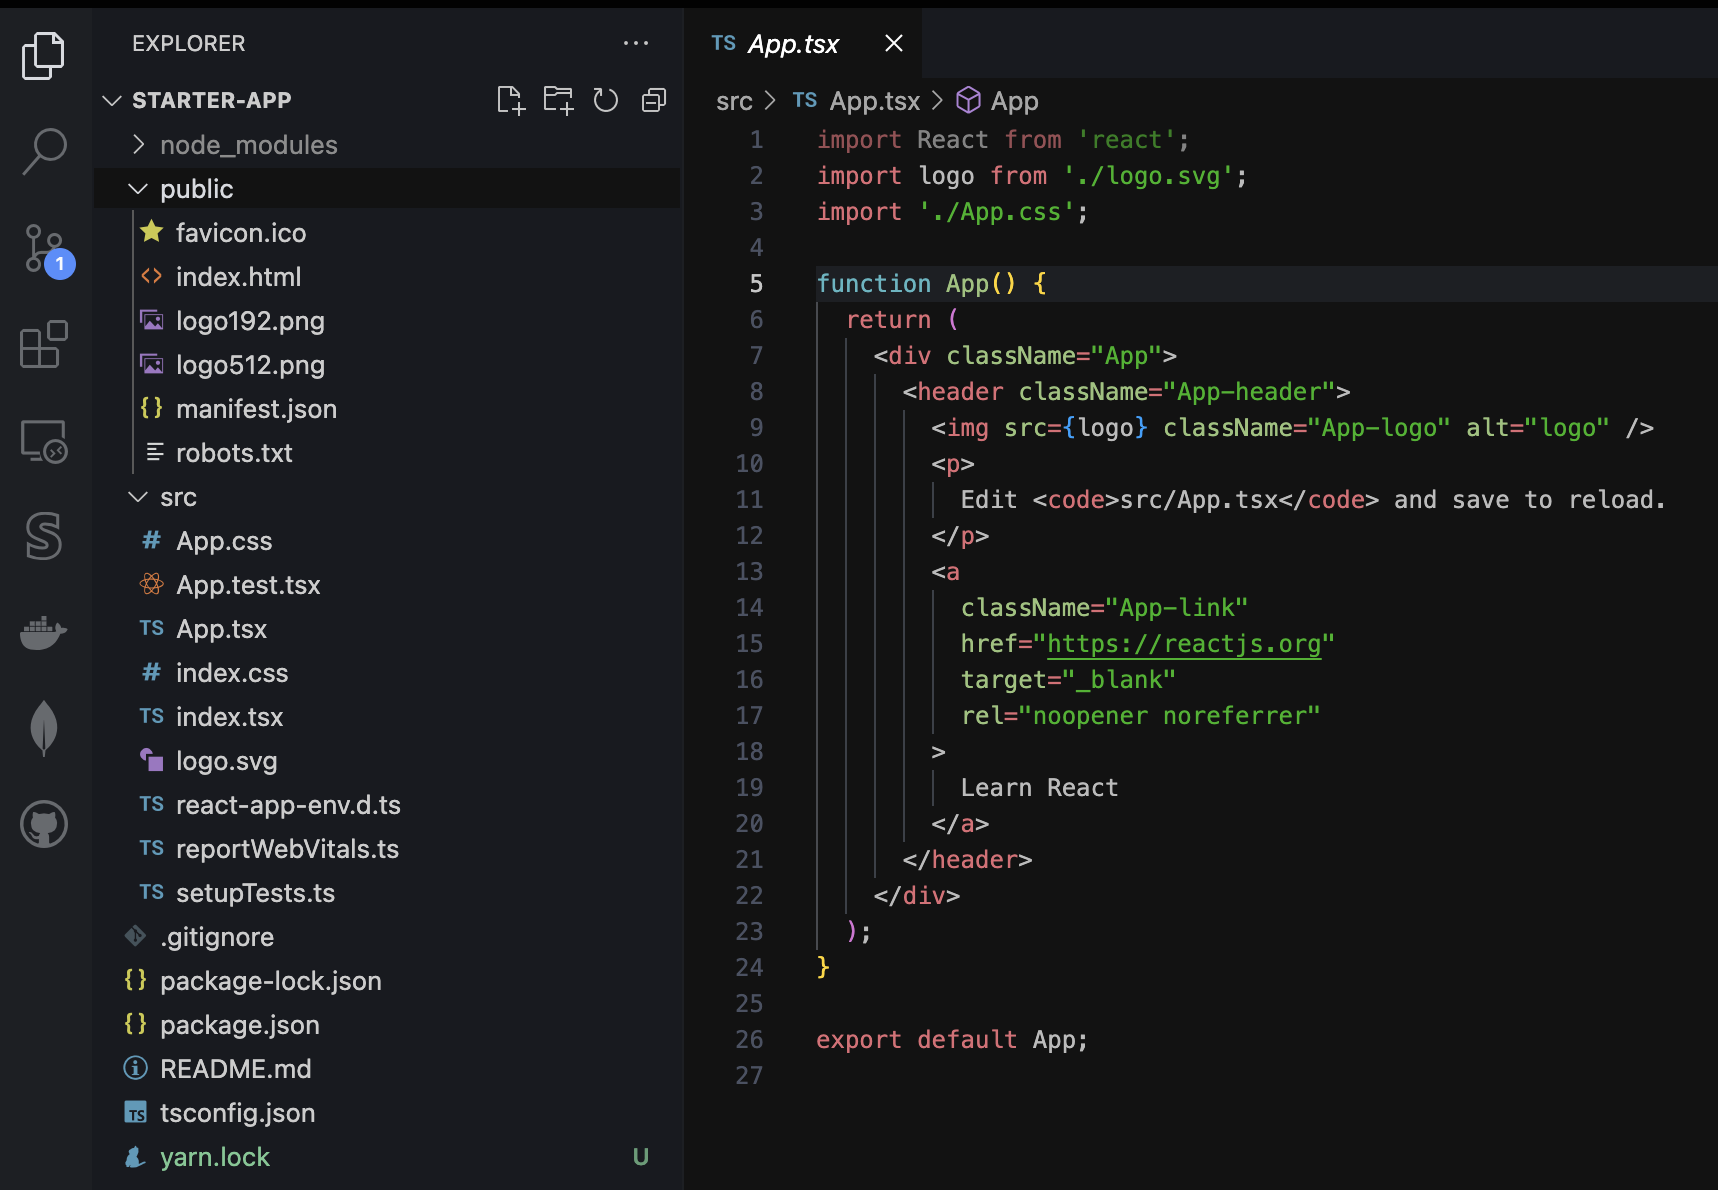
Lets examine what was created for us. Open the project folder "starter-app" in your IDE. I use VSCode.
node_modules
First folder from the top contains the libraries a.k.a dependencies your App uses.
Based on the dependencies defined in the package.json your package manager
(yarn or npm) downloads those packages so your project can make use of them.
Those dependencies include anything needed to make your development process work.
A good read is this guide on package management
public
When we take a look inside the public folder we find some static assets that are used to deployed your app. The index.html is the file that will invoke the Javascript that makes up your app. You can add more assets here yourself although it is strongly advised to import assets in your code instead. Read why
src
The src, short for source, folder is where the magic happens. The code you will be writing yourself is stored here. The features you are going to add to your app will live here.
As a start you have been given some files:
- .css - Cascading Style Sheet
- .ts - Typescript
- .tsx - Typescript versions of .jsx files. We will be talking a lot about .jsx files so don't worry if you not grasp it all immediately, we will get there!
- .svg - A Scalable Vector Graphic, the logo of React in this case
You are going to work mostly with these type of files to build your app. Lets make sure you get a solid understanding of them.
Hot reload
One of the many cool things Create React App gives us is a development server that supports hot reloading of your code. You will move faster with changes immediately applied to the browser as you type them.
To see this live in action go to the src folder in the project and open
the App.tsx file, change some text and save the file.
Check your browser at http://localhost:3000. The changes have been applied instantly!
Cool stuff. We are set to build an awesome app 💪🏼